
This blog may contain affiliate links. For more information on my disclosure policy please visit my Privacy Policy and Disclosures here
I can’t believe that Valentine’s Day is right around the corner! When did that happen?! To celebrate the occasion I decided to turn a plain pink t shirt into an adorable Valentine’s day shirt for M. I had bought a shirt at Walmart two weeks ago! I actually even meant to get it done last week, but you know how that goes! Time got away from me…
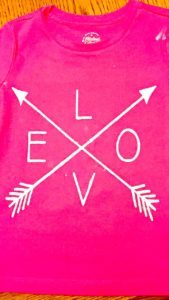
I’m not sure what I love more about this shirt: the design or the fact that M will be be able to wear it again and again on a day that isn’t Valentine’s!
I had been hearing about the “Freezer Paper Method” for awhile now, since before I got my Cricut actually, but it’s just now that I had the time to try it out. I’m a much bigger fan of this than using iron on transfer (HTV) vinyl. Sure, it’s a little messier, but it’s CHEAPER!! A roll of HTV can be super expensive a, and depending on the design you’ve got in mind it can take up that whole roll! YIKES!!!
The freezer paper method is not only super easy but super cheap!! This shirt was $3.50, the paint $0.87!! We always have freezer paper around the house anyways, but a roll is around $5 at our Walmart.
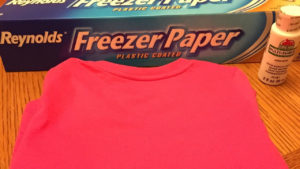
Here’s what you need to make your own Valentine’s day shirt:
- Shirt
- Iron
- Craft sponge
- Multi-surface paint OR fabric paint
- Freezer paper
- Design of your choosing
Cut your freezer paper to fit your mat or design type. This step depends on the size of your design. For my design I cut a 12×12 piece. Place the freezer paper on your mat SHINY SIDE UP!! Click “Go”.
Select “MIRROR IMAGE” option. The shiny side will go UP on the mat and DOWN on your shirt so this is not a step that you can skip unless you want your design to be completely backwards.
Load your mat as directed and if you own a Cricut Explore Air 2 change your blade setting’s dial to “CUSTOM” and select “PARCHMENT PAPER”. If you don’t change the setting you risk cutting your mat.
Select “Cut” and wait for it to cut!
Carefully “weed” your design and peel your stencil off the mat. When I was weeding my design I almost forgot the center part of the “O” on my sticky mat, glad I caught that early!
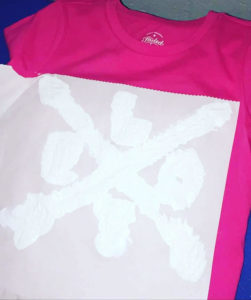
Place your stencil on your shirt – shiny side DOWN! Iron it on, making sure that your stencil is completely adhered to your shirt to prevent bleeding of your paint.
DAB your paint onto your shirt with your craft sponge. You may have to go over more than once. Dabbing works better than brushing the paint on and also prevents bleeding of the paint.
If you thought that finding an image to go on your shirt was difficult, this step might be a smidge harder, especially if you’re as impatient as I am. Wait for your paint to dry. Booooring! Here’s a quick tip: you can use your hair dryer to speed up the drying process! You’re welcome! Once your paint is completely dry it is safe to peel off your stencil and admire your work!
Washing instructions: Wash according to the tag on shirt but be sure to flip the shirt inside out to preserve the paint!
This design is adorable, and like you said, I also love the fact that the kids can wear this throughout the year and not just on Valentine’s Day!
Thank you!
That’s definitely a huge plus. There’s nothing quite as frustrating as spending $10 or more on a holiday themed shirt that can only be worn once.
This is such a great idea and I love that it doesn’t cost a lot!
Belle | One Awesome Momma
Thank you! That’s one of my favorite things too…I just can’t justify spending $10 or more on a holiday themed shirt, this way is much cheaper.
what a cute shirt. I bet my daughter would love doing something like this together for the holiday.
This would be a fun mother/daughter activity for sure!
I like the design you picked out. This way seems easy enough I guess. You sure can’t beat 5 bucks that’s for sure. Last year I made a Father’s Day shirt with a stencil and spray paint. It lasted through several washes so I was happy.
Thank you!
You’re so right, you definitely can’t! 🙂
This is so cute! I’ve always wanted to try freezer paper stencils
Thank you! You should give it a try, it’s so easy. The hardest part for me was trying to find a design that I liked!
I love making shirts and especially cute ones at minimal cost!
It’s so much fun! I can’t wait to make more.
Great idea and such a great price!
Very cool. Love the design!
Chelsea || http://www.binkiesandbaubles.com
Thank you so much!
What a super fun idea! The kids would be so proud to wear an item of clothing that they were so involved making:)
Yes! It would be a wonderful craft for older children, I’m not quite sure I trust my 3yr old with this type of paint haha.
How adorable! Love that it can be worn around the year, too.
Thank you! Definitely a big plus, I hate buying or making clothes that can only be worn once.
This is such a great idea and so cute!
Thank you!!